s0615353
Member
- Joined
- Jul 4, 2012
- Messages
- 246
- Reaction score
- 20
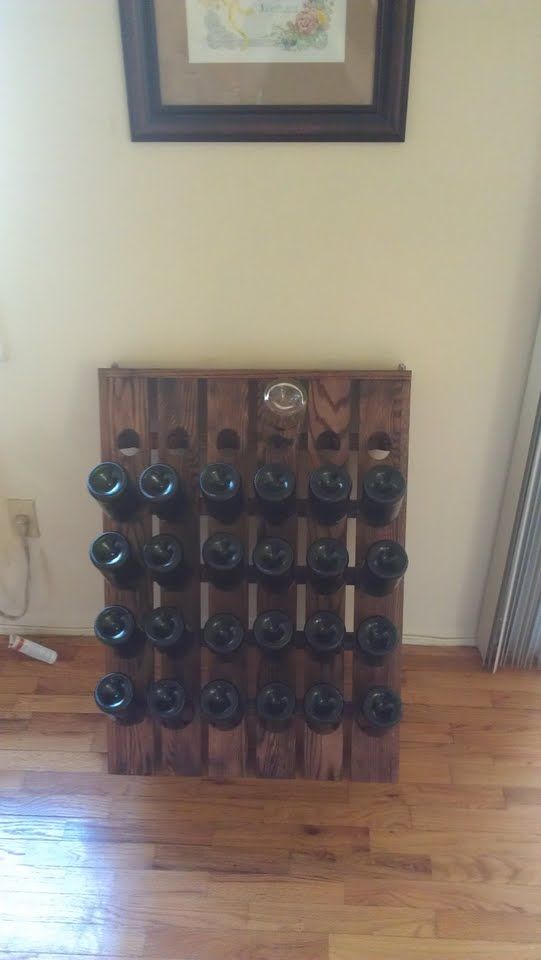
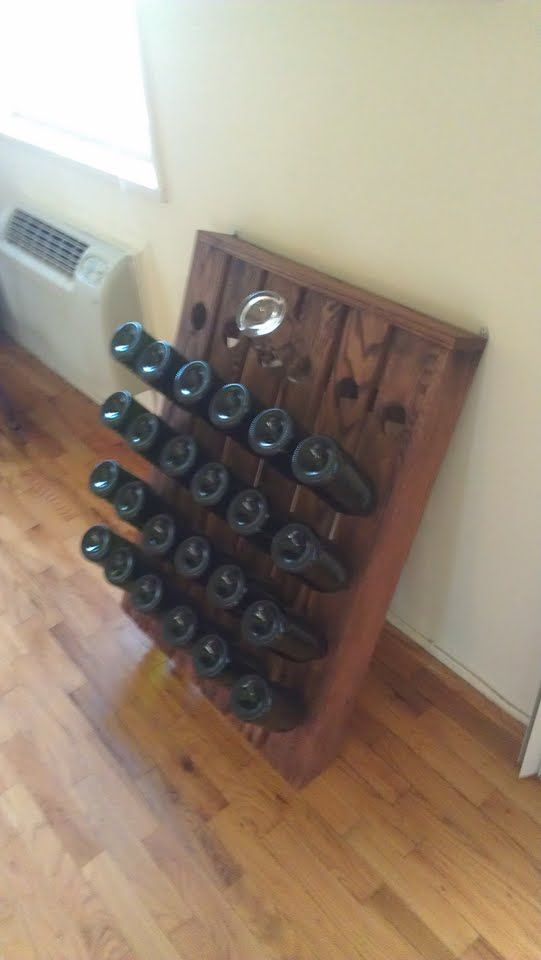
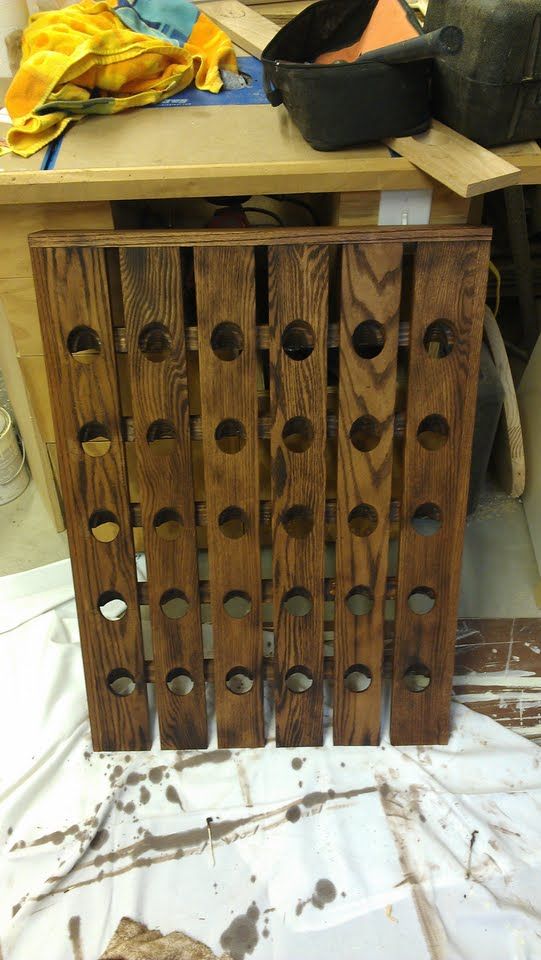
Today I went to a friends house who will never turn down a carpentry project. Our objective was to make a riddling rack. After seven hours of measuring, measuring again, remeasuring again and measuring once more before cutting my riddling rack is done. There was a lot of trial and error, which is why it took so long, if I did it again it would take at least half as much time. The rack holds up to 30 bottles (a 6 gallon batch) and is a great addition to my living room (pictures to come in my apartment once the Minwax dries). Here are some pic's and general guidelines for those do it yourselfer's out there.
Materials
5 1x4x6 ft. oak boards
3 1x2x8 ft. pine boards
1 small can of English Chestnut stain
Small mounting pieces
Total $100
Tools
Too many to type!!!
Step 1
Cut three of the oak boards in half so that they are three foot long each
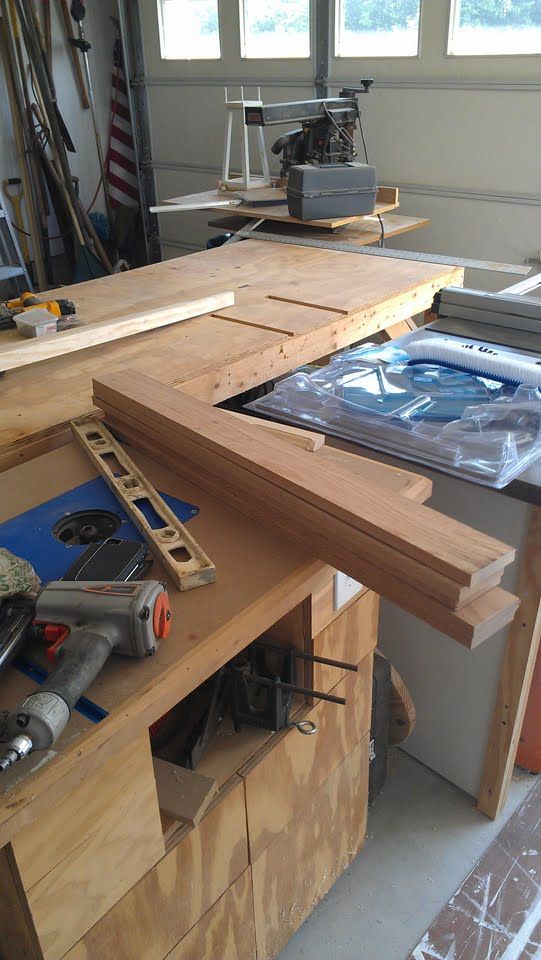
Step 2
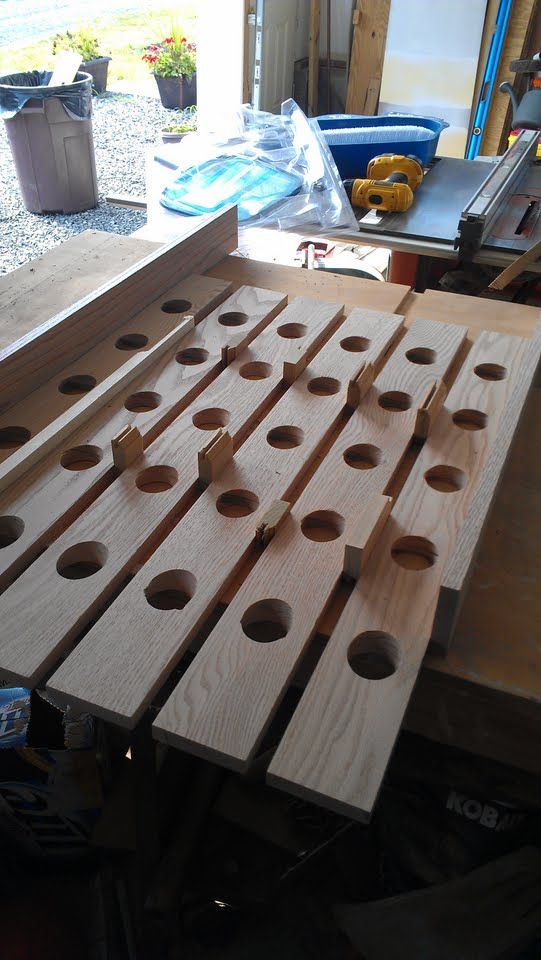
Make a line every six inches on each board to give you a spot to center the drill. Angle a drill press on a 33 degree angle (when the finished board is leaned on a wall it will keep the boards at a perfect 45 degrees). Using a 2 inch bit, drill five holes per board centered on the lines drawn previously.
Step 3
Place 3/4 in. spacers inbetween the drilled 1x4's and measure the length for the pine pieces. Also figure out the center of all of the holes (so you can drill a notch in the pine). Using a 1 3/8 inch bit cut notches in the pine at the same 33 degree angle.
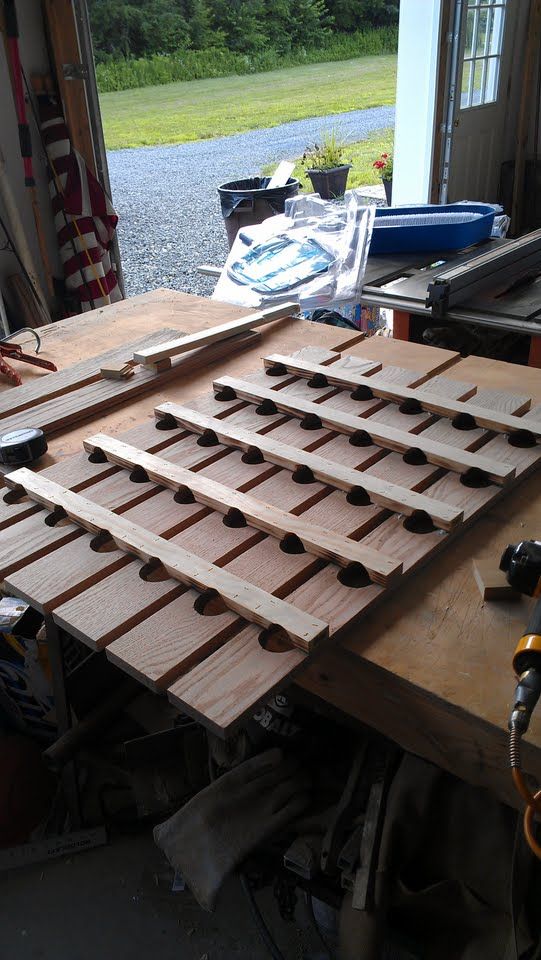
Step 4
Use the leftover oak to crate a top and side frame. Place 3/4 in. spacers inbetween the drilled 1x4's.
Step 5
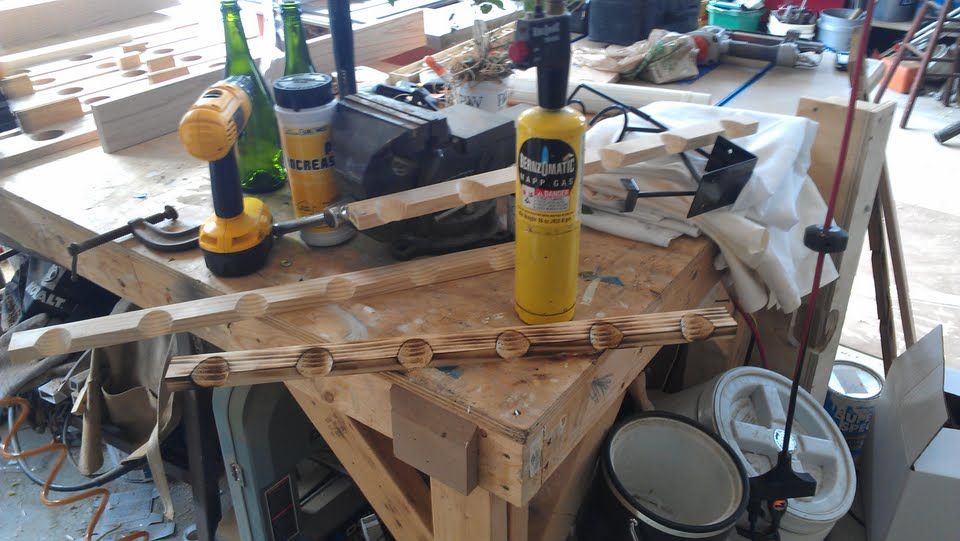
Use a torch to lightly scortch the wood (this will bring more contrast in the grain for staining later)
Step 6
Nail everything in place, cut the bottom of the rack at a slight angle and give it a final sand before staining.
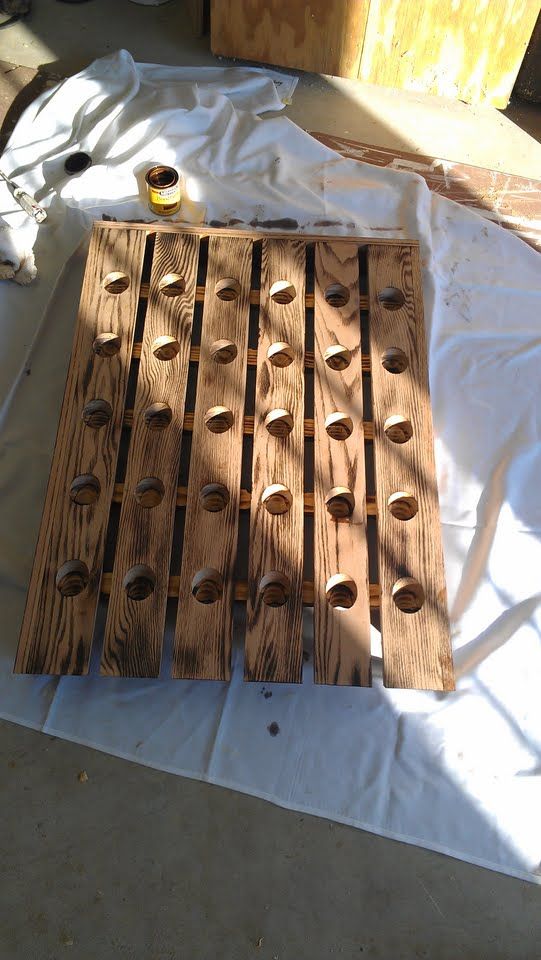
After all of that work, we were really proud of the results
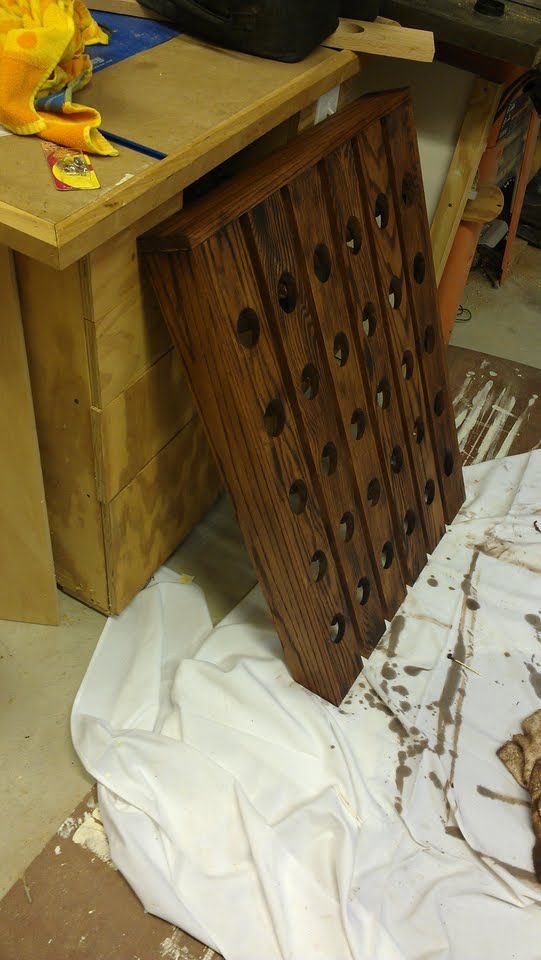
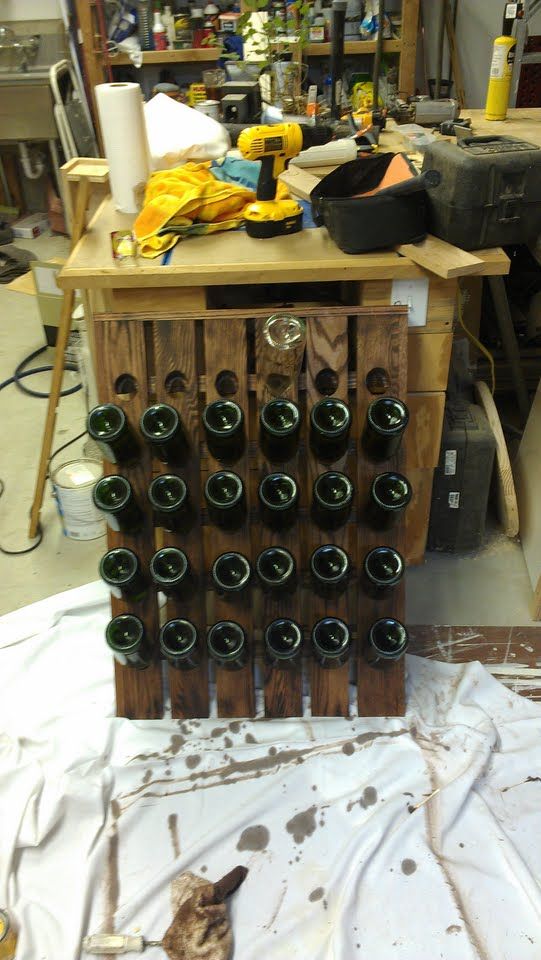
Materials
5 1x4x6 ft. oak boards
3 1x2x8 ft. pine boards
1 small can of English Chestnut stain
Small mounting pieces
Total $100
Tools
Too many to type!!!
Step 1
Cut three of the oak boards in half so that they are three foot long each

Step 2
Make a line every six inches on each board to give you a spot to center the drill. Angle a drill press on a 33 degree angle (when the finished board is leaned on a wall it will keep the boards at a perfect 45 degrees). Using a 2 inch bit, drill five holes per board centered on the lines drawn previously.
Step 3
Place 3/4 in. spacers inbetween the drilled 1x4's and measure the length for the pine pieces. Also figure out the center of all of the holes (so you can drill a notch in the pine). Using a 1 3/8 inch bit cut notches in the pine at the same 33 degree angle.

Step 4
Use the leftover oak to crate a top and side frame. Place 3/4 in. spacers inbetween the drilled 1x4's.

Step 5
Use a torch to lightly scortch the wood (this will bring more contrast in the grain for staining later)

Step 6
Nail everything in place, cut the bottom of the rack at a slight angle and give it a final sand before staining.

After all of that work, we were really proud of the results


![[Upgraded] 9Pcs Tree Root Growing Box with Drain Holes, Half Transparent Plant Rooting Propagation Ball & Metal Core Twist Ties, for Fast Propagation Plants (Size M)](https://m.media-amazon.com/images/I/514MWQxtWOL._SL500_.jpg)


