What are your "Top 10" including equipment/tips/tricks pertaining to Kit Wine Making?

Winemaking Talk - Winemaking Forum

Help Support Winemaking Talk - Winemaking Forum:

This site may earn a commission from merchant affiliate links, including eBay, Amazon, and others.
I've only been doing this for 2 years so am probably not qualified to make such a list. My list will be more newby oriented. Also, my list is in no particular order and will shamelessly steal from other people's lists.
  • I love my AIO as much as anyone here. Makes so many tasks easier and not frustrating.
  • That said, the first "optional" tool I bought was the floor stand corker. I took one look at the corker that came with my beginner's kit and said no way. I have chronic tendon issues with my thumbs and can't see using one of those 30 times.
  • Like others have said, make some that will be ready more quickly along with those you will want to age. Not only will it keep you out of the good stuff, it will help hone your skills.
  • Unlike some, I have grown almost anti-label. I will use the easy-off ones that come with some kits but really don't enjoy pealing labels. Mostly I just write on the bottles with a glass marker or even dry erase markers. Batch number, what it is and bottling date is about all that goes on the bottle. All other information is in the notes.
  • Read this forum often. I am trying at least 7 things from Brian55's list and all of them I learned about by reading this forum.
So I was only able to come up with 5 but will refer you to skyfire322 Item 1
1. You don't necessarily need to follow the instructions.
 
Brian, in #2, what is EM? Also, in #9, what is LE? Thanks..................................Dizzy
Dizzy,

EM is extended Maceration see Stag Leap EM

LE is WinExperts Limited Edition - 4 wine unique wines Available from December to March each year - generally need to be preordered. RJS has the same type of thing called RQ (restricted quantity)
 
Brian, in #2, what is EM? Also, in #9, what is LE? Thanks..................................Dizzy
EM = Extended Maceration. This is when you leave the included grape skins on the must for a month or more. The directions on most kits say to remove the skins after primary. I've left the skins on up to 10 weeks with excellent results. Google Tim Vandergrift and look for his video series on the subject. Excellent...

LE = Limited Edition. This is Winexpert's annual offerings of their high end kits. Like RJS RQ kits (restricted quantities) they are excellent most of the time.
 
They won't hold 6 gallons of wine if your carboy breaks though. At least the ones I've seen.
The milk crate is not insurance if the carboy breakage, it’s protection to prevent the carboy from breaking.
 
The lessons that I have learned the hard way from making white wine kits the past year.
  1. Goldilocks of sulfide management is hard: The sulfide provided in the kit is to high and strips flavors and potentially overdose with sulfide if you store in carboy and put 1/4 tsp every 3 month. After trial and errors, my current regiment is 1/4 tsp of effervescent SO2 regardless of the PH and current SO2 levels and check every 2 months. (white wine change quickly when the CO2 dissipates). I do not rack when adding SO2. The effervescent will do the mixing. (Note when the wine is young and has CO2 it does volcano so add very slowly). I also try to bottle shortly after natural clearing to reduce sulfide adds. (Note: the remaining drip from sanitation with potassium sulfide + acid in a bottle did make a difference in one batch.)
  2. Stirring and air during primary fermentation seems to produce bland white wines for me. I now keep open and room temp first 24 hours and then close off and put in an old refrigerator with ink bird to control temp about 65F. I do put in Ferm K at 1.05 - 1.04 (I know some even go lower with temp).
  3. I add Options-white, Booster blanc during fermentation. This provide a fruitier flavor for me. I also use FT soft blanc but have learned to taste before adding after fermentation. It does soften/smooth some of the harshness of young wine. However, one time blinding adding it made it wine a little too sweet for my liking.
 
1. Listen to what the more experienced wine makers do, and more importantly, why they do it. Do your own research. Make your own informed decisions.

2. Use a hydrometer consistently at every step in the process. It is your friend.

3. Read the kit instructions and understand what is happening at each step.

4. Understand what the additives are and why they are in the kit.

5. Keep good notes. Write it down, and save your notes from previous batches.

6. The kit instructions do not tell you when fermentation is complete -- the hydrometer does.

7. Post-fermentation time frames in kit instructions are not rules, they are minimum values. You can always age the wine longer at each step.

8. Fight your own impatience. Wine making requires patience and rushing is almost always a mistake.

9. Cleanliness is critical to success.

10. The most expensive kits do not necessarily make the best wine, and cheapest kits do not necessarily make the worst wine.
 
EM = Extended Maceration. This is when you leave the included grape skins on the must for a month or more. The directions on most kits say to remove the skins after primary. I've left the skins on up to 10 weeks with excellent results. Google Tim Vandergrift and look for his video series on the subject. Excellent...

LE = Limited Edition. This is Winexpert's annual offerings of their high end kits. Like RJS RQ kits (restricted quantities) they are excellent most of the time.
Thankyou for the enlightenment......................Dizzy
 
The lessons that I have learned the hard way from making white wine kits the past year.
  1. Goldilocks of sulfide management is hard: The sulfide provided in the kit is to high and strips flavors and potentially overdose with sulfide if you store in carboy and put 1/4 tsp every 3 month. After trial and errors, my current regiment is 1/4 tsp of effervescent SO2 regardless of the PH and current SO2 levels and check every 2 months. (white wine change quickly when the CO2 dissipates). I do not rack when adding SO2. The effervescent will do the mixing. (Note when the wine is young and has CO2 it does volcano so add very slowly). I also try to bottle shortly after natural clearing to reduce sulfide adds. (Note: the remaining drip from sanitation with potassium sulfide + acid in a bottle did make a difference in one batch.)
  2. Stirring and air during primary fermentation seems to produce bland white wines for me. I now keep open and room temp first 24 hours and then close off and put in an old refrigerator with ink bird to control temp about 65F. I do put in Ferm K at 1.05 - 1.04 (I know some even go lower with temp).
  3. I add Options-white, Booster blanc during fermentation. This provide a fruitier flavor for me. I also use FT soft blanc but have learned to taste before adding after fermentation. It does soften/smooth some of the harshness of young wine. However, one time blinding adding it made it wine a little too sweet for my liking.
What's an "ink bird"?............Dizzy
 
I am new to this hobby, but here are a few of my must-haves:
1. AIO
2. Floor corker
3. Amoretti fruit purees , 8 oz. from Label Peelers (to enhance the fruit flavor of a fruit wine.......they are terrific!)
4. Fun and attractive labels
5. "Slant Rim"crystal wine glasses by Craftware (because of the slant, the nose is closer to the bouquet given off by the wine, thus one can "smell the bouquet"
at the same time as tasting the wine. Makes the whole experience enhanced.
6. Different size bottles/jugs/carboys with appropriate bungs for use in aging
7, Patience and attention to details and sanitation
That's ll I can think of right now...........................................................Dizzy
 
Equipment? Here's an area for argume--, err, discussion!

Must Have? This list is the equipment to start wine making. I started with less, and some folks do not have the resources or availability to get more.
  • food grade bucket or ceramic crock for primary fermentation
  • glass secondary containers of appropriate size + closure of some kind
  • smaller bottles for topup
  • plain racking tube
  • screw caps bottles
  • long handle spoon for stirring
My first batch of wine was made in a used beer ball (5 gallon plastic sphere, mini-keg) that acted as the primary and secondary fermenter. I lacked a siphon (racking) hose so I poured it off the sediment and later into plastic screwcap whiskey bottles. Yes, the result was wine ... but above list helps in making good wine. ;)

Should Have! However, I don't recommend anyone start making wine without a hydrometer.
  • hydrometer
  • 8+ gallon food grade primary fermenter
  • drilled stoppers + air locks for all containers
  • cheap corker
  • corkable glass wine bottles
Screw cap bottles work, but with repeated usage the seal will eventually fail, so they are not generally recommended. Don't try to cork them -- the necks are weaker than corkable bottles and can shatter during corking.

Getting Serious? If ya think yer gonna do it more than once, pick up a few helpful toys.
  • self-priming racking tube
  • filler tube (for bottling)
  • good corker, preferably a floor cooker
  • stainless steel stirring rod or spoon
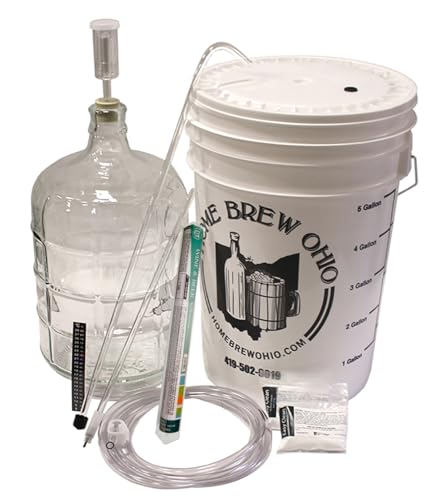
For a beginner, IMO the best choice is to purchase a hardware kit, something like this one. Note, I'm not pimping my local shop, this is for illustration.

Buy locally when you can -- support them when they need you so they will be there when you need them.

Dang! This is fun! Yes, as ya get more into the hobby, get more useful toys.
  • Several extra carboys
  • Several extra primary fermenters
  • Fermtech wine thief *
  • yet more bottles of all sizes for topup
  • drilled stoppers + air locks for all containers, better too many than too few
  • vented bungs
  • drill mounted stirring rod
  • thermometer
* The Fermtech wine thief is (I think) the only brand name product I’m attached to. It makes checking SG in the carboy or barrel easier with minimal air contact.

Other Stuff ....
  • Test kits, including pH and Total Acid (TA)
I have pH paper and a TA kit. Like most people, I suck at performing TA titration so I use it sporadically. The only test equipment I use consistently is the hydrometer.

One toy I don't have but gets glowing reviews ... I may get one, as it should speed up racking a barrel by a LOT.
  • Vacuum pump
 
What's an "ink bird"?............Dizzy
Below is the link for what I have. There are other brands of controllers that are similar. I attach the probe to the outside of my fermentation vessel by HVAC tape.
I got an old apartment size refridge off Craigs list for $100. We put a think piece of plywood for a flat bottom and it just fits a Speidel 30L fermentor with airlock, So I would be mindful of the measurements.


https://www.amazon.com/Inkbird-Ther...jbGlja1JlZGlyZWN0JmRvTm90TG9nQ2xpY2s9dHJ1ZQ==
 
I am new to this hobby, but here are a few of my must-haves:
1. AIO
2. Floor corker
3. Amoretti fruit purees , 8 oz. from Label Peelers (to enhance the fruit flavor of a fruit wine.......they are terrific!)
4. Fun and attractive labels
5. "Slant Rim"crystal wine glasses by Craftware (because of the slant, the nose is closer to the bouquet given off by the wine, thus one can "smell the bouquet"
at the same time as tasting the wine. Makes the whole experience enhanced.
6. Different size bottles/jugs/carboys with appropriate bungs for use in aging
7, Patience and attention to details and sanitation
That's ll I can think of right now...........................................................Dizzy
Tell us more about #3, fruit purees. How do you use them? When in the process? How much usually?
 

Latest posts

Back
Top